integration_documentation:instant_frontend:product_listing
Product List Page
You can find this feature in the Customer Account → Instant Frontend → Product list.
Our feature Product List allows you to fairly easy configure the Product Listing Page of your shop.
Settings
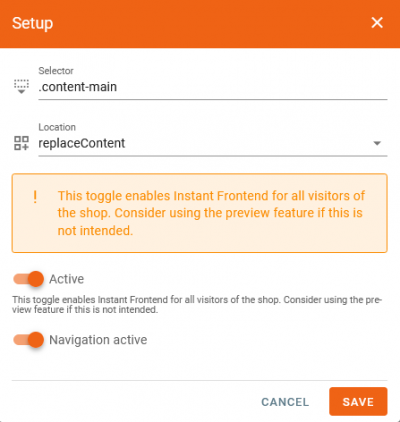
- Selector: Specify the selector where the Product List Page shoud be placed within the Website. Use a selector that covers most of the content (e.g. .fl-outer-container).
- Location: Set the location of the container. The following locations can be used:
- before: Displays Product List Page before the chosen selector.
- unordered List Itemafter: Displays Product List Page after the chosen selector.
- replace: Replaces the container (selector) with the Product List Page container.
- replaceContent: Replaces the content of the given container (selector).
- append: The Product List Page container will be appended within the set container (selector).
- prepend: The Product List Page container will be prepended within the set container (selector).
Active: Please be aware that this Toggle enables the Instant Frontend in the chosen shop. Choose the “Preview Mode” to test the Product List Page without activating it for your shop.
- Navigation active: Activates the Product Listing for all categories.
General
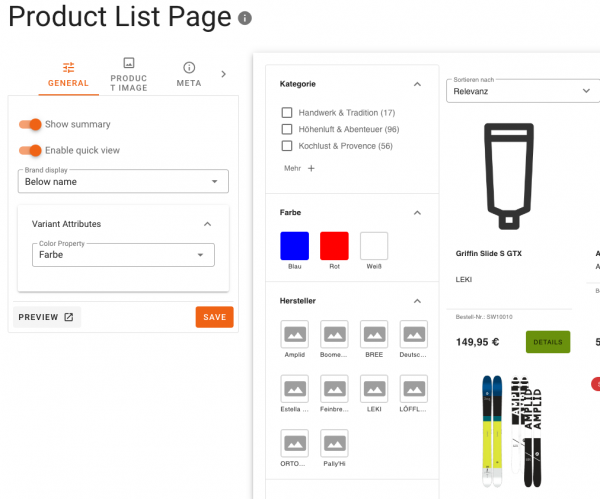
- Show Summary
- Brand display: whether below/above the product name or hidden
- Specify the property that should be used to display variants (at the moment only color variants are supported)
Product Image
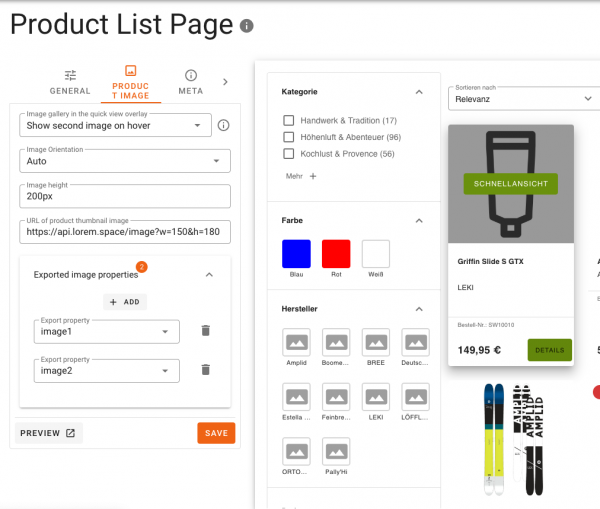
- Set the behavior for the Image gallery in the Quick-View Overlay
- Image Orientation: Auto, Portrait or Landscape Mode will change the orientation for the whole Product Listing Page
- Setting of the Image Gallery Behavior and definition of the related image properties
- Set the URL of the product thumbnail images
- Setting of the related image properties
Meta
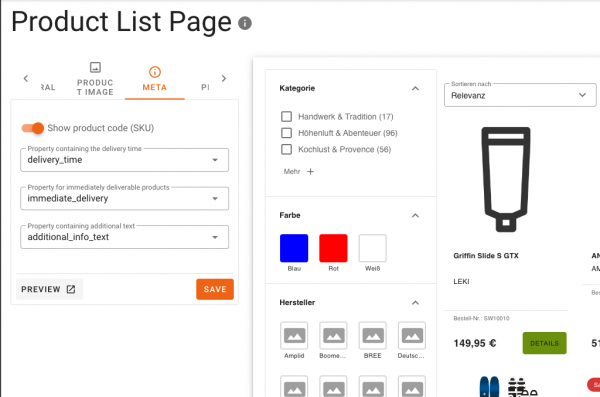
- Show product code: the product code is whichever ordernumber was exported first. If no ordernumber was exported, the ID is used in case of CSV export, and nothing is available in case of XML export
- Set the properties for:
- Delivery Time information
- Immediately deliverable products information
- Additional Text
Price
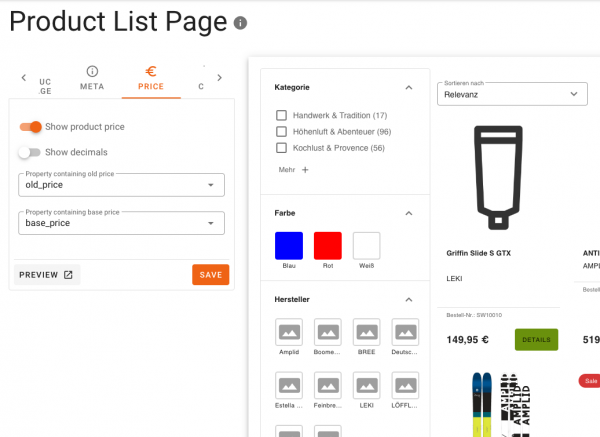
- Show/hide product price
- Show/hide decimals
- Define properties for the old price and the base price if needed
Cart
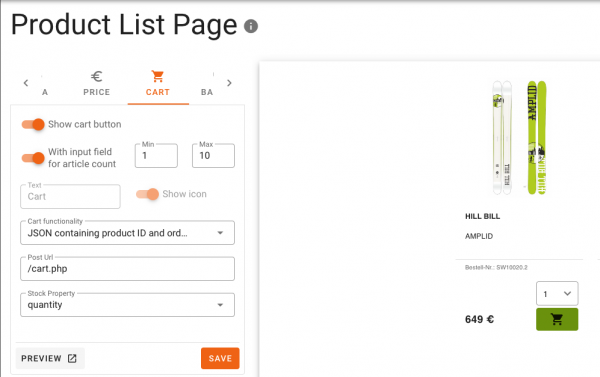
- Within the cart tab you can specify whether the cart button should be shown or hidden on the product list page
- Add an Input Field for the article count on the Product cards - Note: in that case only the icon for the cart will be displayed on the card
- Your own behaviour can be used by providing the Post URL or use the shops specific default implementation
- If using the own shops behaviour you can also specify the property for the stock data
Badges
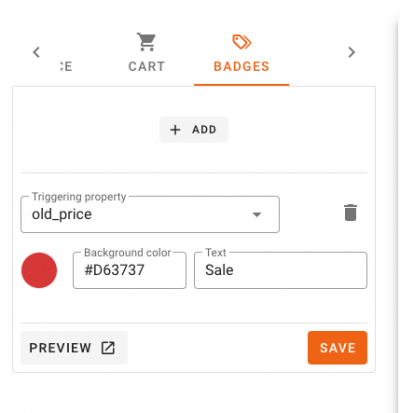
- In the badges Tab you have the possibility to add multiple badges that should be displayed within the product cards
- Set the triggering property, the relevant color for the badge and the Text that should be displayed
CI
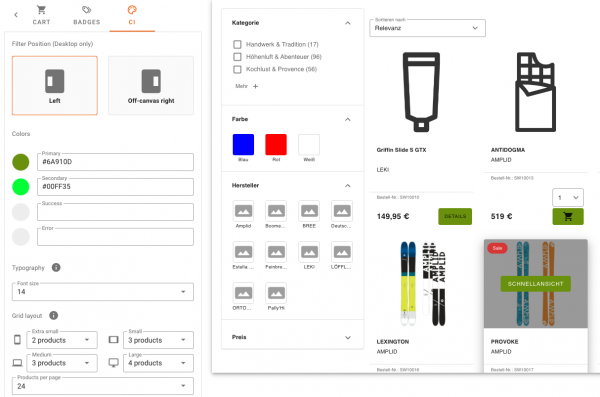
- In the CI Tab you can set the Filter Position for Desktop and the colors to use for the product list page
- Additionally you can set the primary (CTA’s) and secondary colors (e.g. delete all filters) for the PLP
- By default we inherit the shops font face for the product listing page frontend with the typography they can change the font size displayed on the PLP
- Set the grid layouts for different device sizes
- Products per page allows to define how many products should be shown before the pagination will be applied
If you are using Shopware 6 and want to use the add-to-cart button you have to change the CSRF mode to “ajax”. To change the CSRF mode in a Shopware 6 shop, change the property storefront.csrf.mode to “ajax” in vendor/shopware/storefront/Resources/config/packages/storefront.yaml and clear the cache.
Note that any CSS-based customization may cause problems as deployment for PLP may take place at any time. If you plan to do this, please check with your integration consultant or support.
